
Top Summer Nail Trends
Top Summer Nail Trends
Summer is upon us, and it’s all about flaunting your manicures at the pool and the beach this season! However, you probably don’t even know where to start with your nails, so keep reading!
Nail Shapes
Medium/long almond and oval shapes are all the rage this summer. Medium/long ballerina and coffin shapes are still in (and probably always will be), just with specific designs. Short square is cute, too, if you can’t handle long nails!


Ballerina Nails Coffin Nails Short Square
Nail Designs
Standard White
The white nail trend is perfect for “hot girl summer.” We love the bright white and how it stands out! This colour is most popular on medium coffin-shaped nails but can be done on any nail shape or length.

Bright White
What you’ll need
Base coat
White polish
Glossy top coat
Steps:
- Prep your nails by trimming/filing to the desired shape, if needed.
- Paint a layer of base coat to protect your natural nails from the colour polish and cure/dry.
- Paint your first layer of white polish over your nails, being sure to avoid the sides of the nail and the cuticle. Dry.
- Paint another layer of white polish, if needed. The colour should be fully opaque.
- Finish with your favourite glossy top coat and dry.
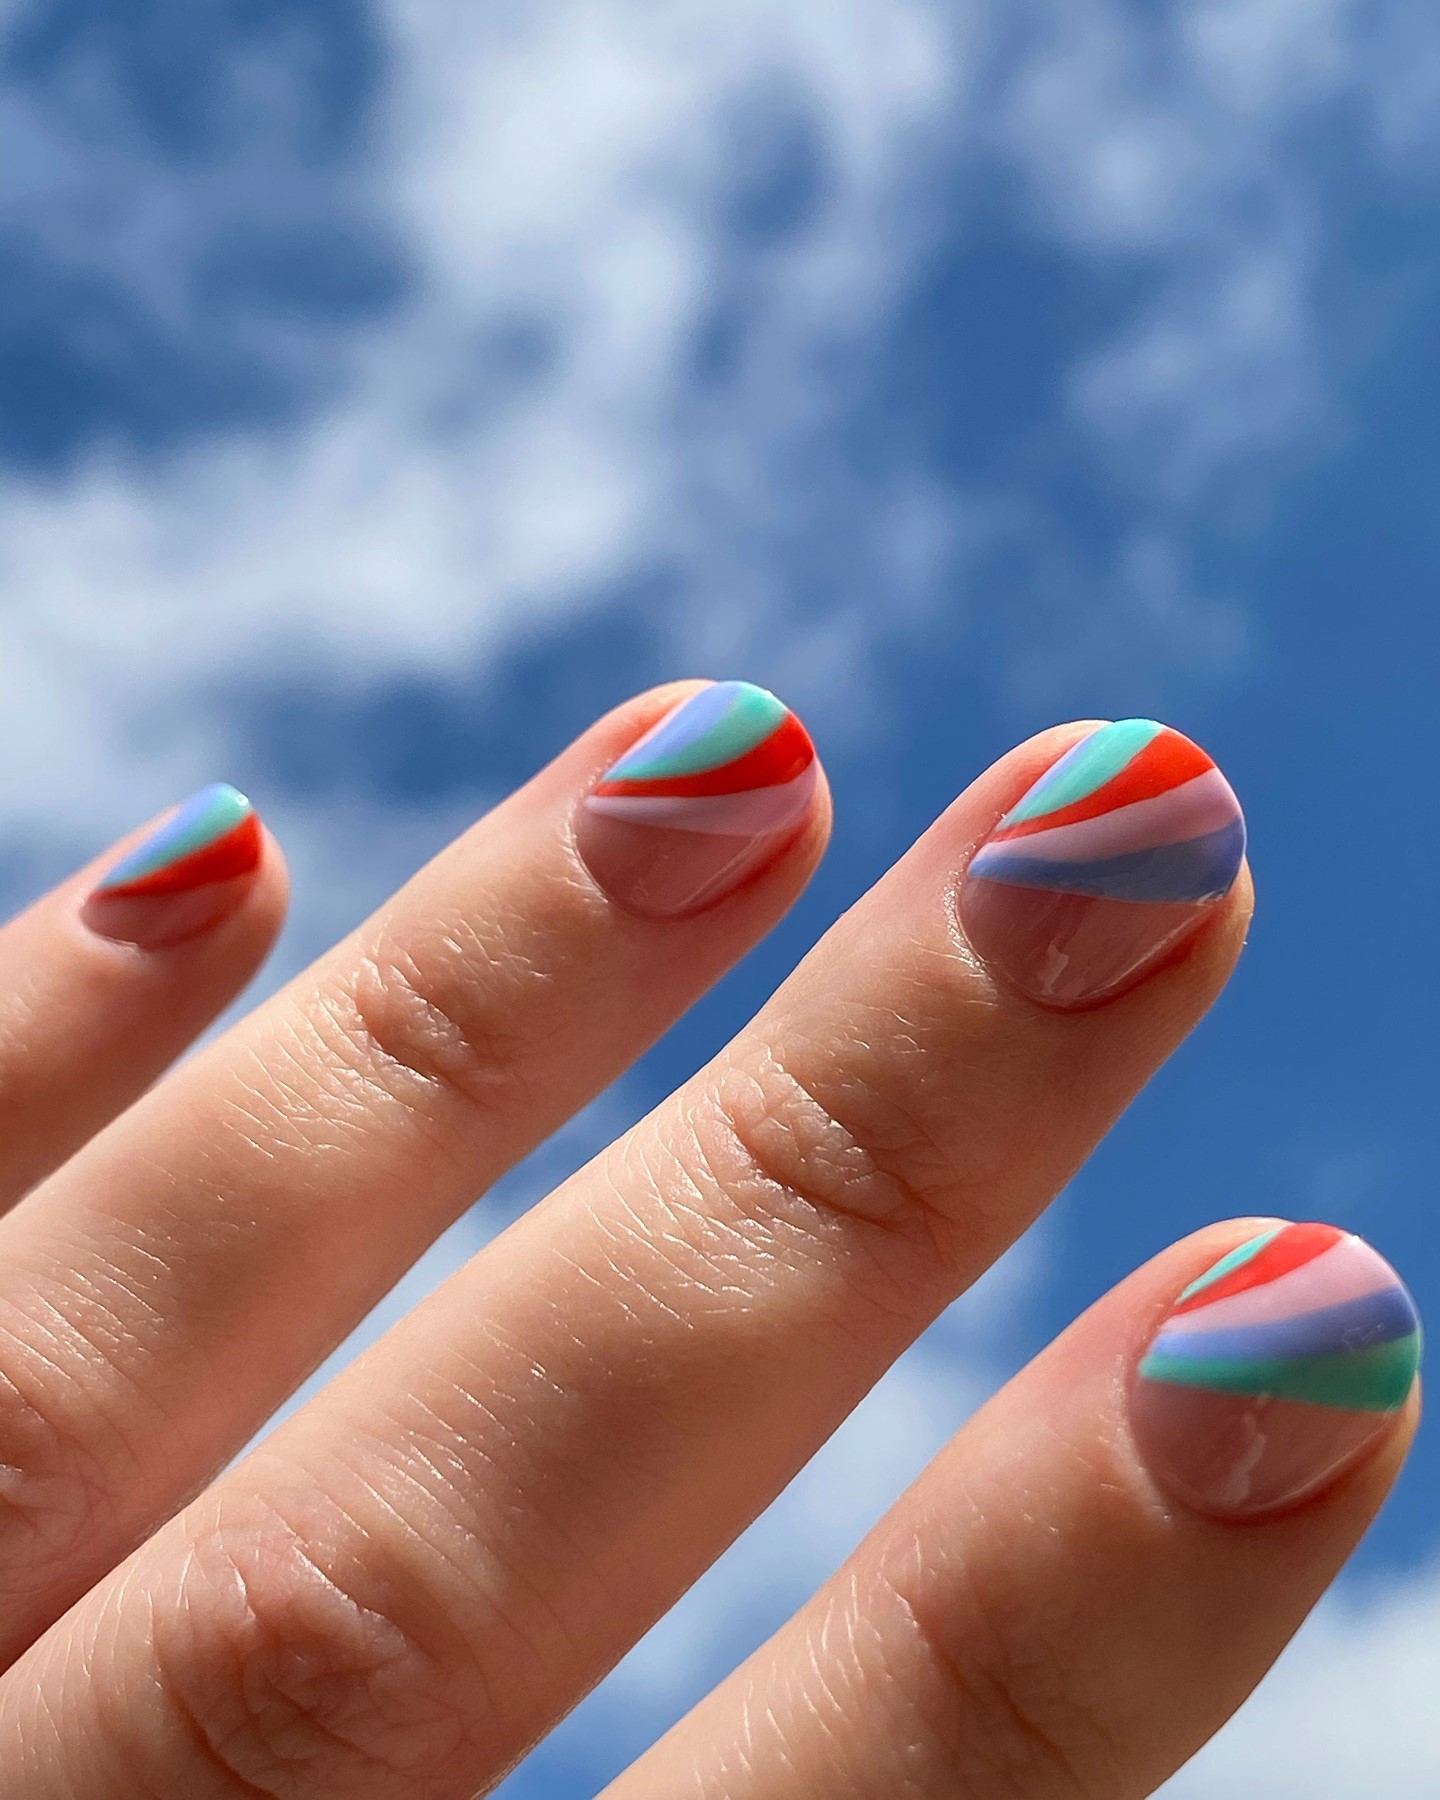
Curvy Lines
This nail art trend is super easy to follow and still super cute! The curvy minimalist lines are especially popular on almond and oval-shaped nails rather than coffin or ballerina but can be adapted to any nail shape you want.

Curved lines
What you’ll need:
Base colour (preferable a lighter colour in the same colour scheme)
At least 3 polishes in the same colour but different hues (line colours)
Base coat
Glossy or matte top coat
Detailing brush
UV lamp, if using gel polishes.
Steps:
- File and buff your nails to the shape and length you desire.
- Paint on a layer of base coat and cure/wait for it to dry.
- Paint the first layer of your base colour and cure/wait for it to dry.
- Repeat step 3 for a second layer if needed.
- Take a detail brush and dip it into one of your line colours and start drawing squiggles across the nails.
- Repeat step 5 with the other two colours alongside the first colour and wait for the polish to dry or cure under the UV lamp.
- Finish with a top coat and dry/cure.
Mermaid Nails
This is a fun and easy way to spruce up any nails, long or short!

Mermaid Nails
What you’ll need:
Base coat
Base colour (dark green, ideally)
Mermaid nail stickers
Polish colour of choice (light green, ideally)
Glossy top coat
Steps:
- Prep nails as needed.
- Paint base coat, dry.
- Paint the first layer of base colour, dry.
- Paint a second layer of base colour if needed and dry.
- Place mermaid scale stickers over the nails and press them down.
- Paint the lighter green over the stickers and remove the stickers while polish is still wet. Wait for polish to dry.
- Paint a glossy top coat, and that’s it!
No Time to Do It Yourself?
Going to the salon can be a hassle, so why not just print your polish right on your nails? Click here to visit our site and discover the revolutionary new way to do your nails perfectly.